Summary
Editing sandbox settings on a Project Zomboid server enables server operators to fine-tune various aspects of the game, such as zombie behavior, item scarcity, and environmental conditions. By editing sandbox settings, administrators can create a distinct and immersive gaming environment, whether they want to emphasize survival realism, intensify challenges, or encourage a more cooperative gameplay style. This flexibility ensures that the Project Zomboid server can adapt to different player communities, providing a personalized and enjoyable experience that aligns with the vision and preferences of the server administrators and its player base.
| Requirement |
| Admin permissions are required to edit sandbox settings on the server. Learn how to add admins here. |
| Note | Learn how to upload custom sandbox settings here. |
| Note | Make backups locally to save any necessary files. |
How to Edit Sandbox Settings on a Project Zomboid Server (Ingame)
1. Join the server as an admin.
2. Click the Admin icon to open the Admin Panel.![]()
3. Select Sandbox Options.![]()
4. Go through the tabs and edit the desired settings.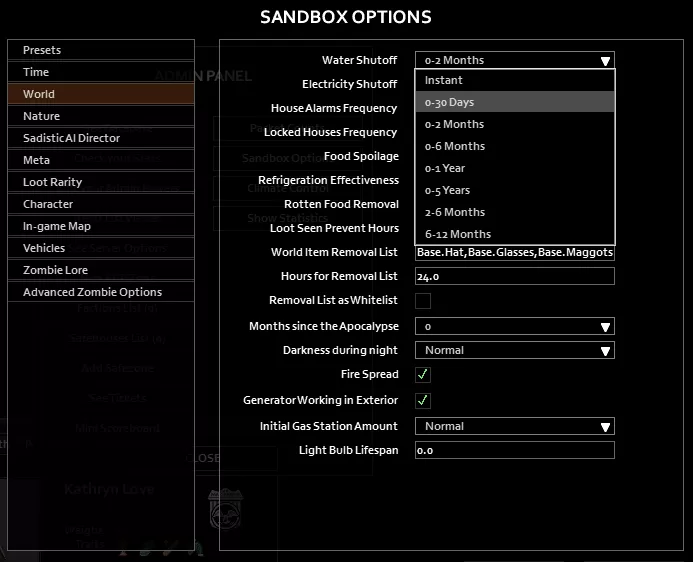
5. Click Apply Changes.![]()
| Note | Some sandbox settings may require a server restart. |
How to Edit Sandbox Settings on a Project Zomboid Server (Manual)
1. Log in to the BisectHosting Games panel.
2. Stop the server.![]()
3. Go to the Startup tab.![]()
4. On the Save/Config Name table, take note of the name.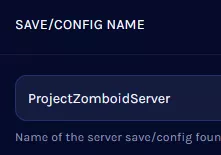
5. Go to the Files tab.![]()
6. Find the following directory: /home/container/.cache/Server .![]()
7. Open [Save/Config Name]_SandboxVars.lua for editing.![]()
8. Modify the desired settings.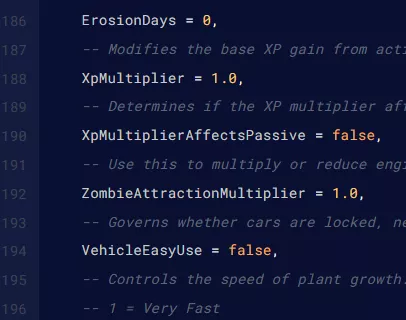
9. Choose the Save Content button on the lower right.
10. Start the server.![]()

