Summary
Arma 3 offers players the ability to create custom missions. These missions range from small-scale operations to large-scale battles that involve dozens of players. With the ability to create custom missions, players can enjoy endless replayability in Arma 3 and continue challenging themselves and others with new and exciting gameplay experiences. Additionally, adding mods is a great way to enhance gameplay further. Learn how to add mods to an Arma 3 server here.
How to Add Custom Missions to an Arma 3 Server
1. From the Arma Steam page, choose the Workshop tab.![]()
2. Subscribe to the desired Custom Mission.![]()
3. Wait a minute for Arma 3 to update.
4. Find the following directory locally: SteamLibrary/steamapps/workshop/content/107410 .![]()
5. Open the folder with the desired mission's workshop ID from Step 2.![]()
6. Rename the file to MissionName.Terrain.pbo .![]()
| Note | MissionName is the name of the Steam Workshop mission. Terrain is the map of the Steam Workshop mission. |
7. Log in to the BisectHosting Games panel.
8. Stop the server.![]()
9. Go to the Files tab.![]()
10. Choose the mpmissions folder.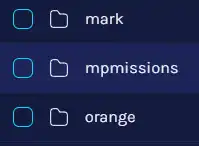
11. Upload the .pbo file from Step 6.
12. Go to Config Files > Server Config from the left sidebar. 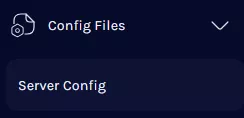
13. Navigate to the // Missions Cycle line.![]()
14. Under a class Mission, change the value of template = to the name of the .pbo file without the .pbo .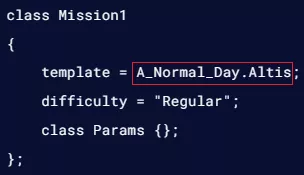
15. Press the Save Content button.
16. Start the server. ![]()